Regarding major home improvement projects, roofing installation is a job best left to Canton Roofing. The work is labor intensive, and the materials are heavy. Plus, it involves working at high elevations where falls are common. From shingles to tar paper, the materials in roofing play a key role in home improvement projects. Whether you’re an experienced contractor or a do-it-yourselfer, this roofing materials list gives you the information you need to find the best materials for your next project.
Wood shingles add style and character to a home’s roof and come in many colors and styles. However, they’re not as long-lived as other roofing materials, and they aren’t the best choice in areas where wildfires are a threat.
Asphalt shingle roofs provide excellent value, and they’re easy to install. They last 15 to 30 years and are available in a wide range of colors and profiles.
Rolled roofing provides an inexpensive solution for sloped-roof buildings like sheds and workshops. It comes in long rolls of mineral-impregnated and asphalt-impregnated material topped with mineral granules.
Built-up roofing (BUR) is one of the oldest types of roofs. It consists of layers of roofing felt impregnated with asphalt or coal tar that are spread hot, while cold-applied adhesives can also be used.
To help you keep your roofing project safe and organized, you’ll need a variety of roofing tools. For example, a nail gun speeds up the installation process, and utility knives allow you to cut shingles and underlayment as needed. You’ll also need a chalk line, which snaps easily to create straight lines on the roof and is essential for installing open valleys and aligning gutters. Finally, you’ll need a work vehicle that can carry your equipment and materials.
In a roofing project, inspection is an important part of the quality control process. The goal of inspection is to verify that work meets the requirements of the contract. Depending on the project, this can include testing or examining materials, equipment, and intermediate assemblies to determine conformity. Generally, the contractor will conduct inspections on each step of construction to detect problems early and ensure that the final product meets requirements.
The first step in reroofing is to inspect the roof deck, or sheathing, for damage. The sheathing must be solid to support the new roofing material. If it is damaged or rotting, the sheathing may need to be replaced. The roofers will also look for areas where water might enter the home, including loose or missing shingles and cracked or damaged mastic around vents or chimneys.
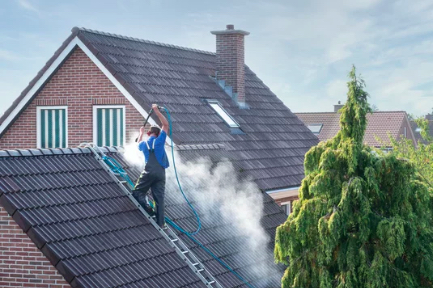
Roofing is hazardous work. The contractors should use fall protection, such as harnesses and safety nets, to prevent falls. They should also wear sturdy shoes, hard hats, and work gloves. They should also be familiar with all the standard roofing tools, including hammers, nail guns, ladders, and shingle cutters. Larger jobs may require more specialized construction equipment like forklifts and tractors. Resources to help promote safety in the roofing industry include: a ladder safety mobile app, infographics and tipsheets, videos, toolbox talks, and safety leadership training. By following the recommended safety measures, roofers can avoid injuries and fatalities.Underlayment is the layer of material directly under your surface or floor covering. It is a very important layer that helps to protect the subfloor from moisture and reduce noise. There are different types of underlayment and they can either be soft or hard.
Before the underlayment can be laid, contractors must first lay an ice and water barrier, which is a sheet of waterproof material that is adhered to the sheathing underneath the shingles and fastened with cap nails. Contractors will also install a drip edge along the bottom of your roof to protect it from water intrusion.
The underlayment is then laid in a row, with each layer being overlapping the last one by about 6 inches. This ensures that there is no space for water to seep under the shingles and ruin your roof. The underlayment is typically made from cork, rubber, foam, or a combination of these materials and is available in various thicknesses.
The most common form of underlayment is foam, which offers a variety of benefits such as sound reduction, mold and mildew protection, and a vapor barrier. It is very cost effective and comes in varying sizes to accommodate different floors and home styles. Another type of underlayment is wood, which is very durable and offers moisture protection. It also comes in a range of insulating and noise-canceling options, including what’s known as 3 in 1 underlayment.
Shingles are the most visible part of your roof, and they are also a vital part of your roofing system. They shed water from your roof in a step-like fashion to prevent it from getting into your home. In addition, they protect your roof from the elements.
There are several types of shingles available, and each has its own unique benefits. For example, some shingle colors can save you money on energy bills. Light-colored shingles reflect heat rather than absorb it, which lowers your roof’s temperature and allows your air conditioner to work more efficiently. Dark shingles, on the other hand, can raise your roof’s temperature and make it harder for your air conditioner to cool the house.
Asphalt shingles are the most popular choice for home roofing, and 3-tab shingles are a common option for homeowners who are looking to get an inexpensive roof that still provides decent protection. Other options include architectural shingles, which are designed to look like high-end roofing materials. They are more expensive than 3-tab shingles but have an impressive lifespan that can exceed 30 years.
Other shingles are made from natural materials like wood, slate or clay. Those roofing materials require special installation techniques and tend to be more costly than asphalt shingles.
Flashing is a roll of metal that’s designed to seal the places where two surfaces meet on a roof. The purpose is to prevent water leaks that can lead to rot, mold and mildew. It’s an important part of any roofing job.
There are different types of flashing to suit a variety of situations. For example, step flashing is often used around protrusions on a roof, such as chimneys and dormers. It’s also commonly installed on the edges of a roof, including gables, eaves and ridges. Other types of flashing include ridge cap, valley and pipe flashing.
Roof flashing is also used in specialty situations, such as the area where differing roof slopes meet and form a V-shaped valley. Because the valley collects so much water, it needs extra protection against moisture damage. Valley flashing can be hidden under shingles, or it can be left exposed like an “apron” to help keep rainwater from seeping into the home.
Roof flashing also includes corner flashing, which is used to protect the corners of a roof where it meets walls or other structures. You can make this kind of flashing yourself with a pair of tin snips or buy pre-bent pieces of flashing. It’s important to install this flashing properly to ensure it is effective. Long pieces of flashing can have trouble flexing with changing exterior temperatures, so they should be anchored to the wood joists with nails or screws to provide maximum protection.
Sealing the roof involves several processes. To begin, the self-sealing adhesive strip on a starter course (first row) of shingles is applied to protect the underlayment. This strip also fills in the gaps between cutouts of three-tab shingles and creates a barrier against water intrusion. All penetrations – including sewer vents, curve vents for bathrooms and kitchen ranges, and more – will be sealed with a bead of roofing cement to prevent water from entering the home through these openings. We will also waterproof the valleys – the areas where slopes meet in “V” angles. This includes using specialized methods for this very important step in roofing installation